Friday, July 7, 2017

Birthday Crafting Volume 2


In my first post about birthday crafting, it was all about my best friend and her beautiful twins. This one is about another special little boy in my life. My, now four year old, nephew. This little one has been extremely special since before he was born. He's the first baby for my sister-in-law and her husband. He's the first grandchild. He's our first nephew. So of course his birthdays are going to be special.

As I also mentioned before, I have become quite the crafter. My sister-in-law is quite the planner. She tells me what she wants, and we work together to execute. My nephew has had a theme birthday party each year, and this year was obviously no different. His first birthday was monster themed, and I can remember being up until two in the morning making decorations and decorating cupcakes for a party that this kid wasn't even going to remember. His second birthday was Mickey Mouse themed thanks to a little show called Mickey Mouse Clubhouse. Thank goodness that Cricut exists and we learned how to use it. It made things so much easier, but again, we were up until all hours of the morning making everything, but he was so excited because everything was Mickey and it was just for him. His third birthday was Toy Story themed. He had just seen Toy Story 3, and was in love with Jessie after our trip to Disney World that winter. And again it was another late night before the party getting everything all finished up.

This year was no different. The phase of the year was Moana, and more specifically for Cameron, Maui. He loves Maui and wanted a Maui Birthday Party, and we were only too happy to oblige. We began looking up different ideas much earlier this year. Because I have the Cricut Explore Air, if we had vector images of the characters, we would be able to cut them out accurately and create some pretty incredible decorations. The banner above was created using stock images and fonts that were available on the Cricut Design Studio. The Moana accents were added by cutting out vector images that my sister-in-law purchased off of Etsy. This banner was a main focal point at the party, and it was hung in the dining room area of their house.

The week of his party, my sister-in-law came over to our house in order to use our Cricut and cut out everything so that we could get things together before the night before the party. She had a massive list of things to accomplish, and we checked off most of them.

She wanted to make...
  • Maui's fish hook for each of 48 Shiny Cupcakes
  • Signs for the cupcakes and heart of Tefiti cookies
  • A large cutout of Hei Hei
  • A large cutout of Pua
  • A large cutout of Tamatoa
  • The happy birthday banner and accents
  • Palm leaves to create palm trees
  • A large cutout of Maui - this one ended up being wishful thinking. We couldn't get it to work for some reason. It was very frustrating.
  • A You're Welcome Poster 
  • Cocamora boxes for trail mix
  • Cocamora coconut cups
  • Popsicle stick canoes for the tables
We'll start with the popsicle stick canoes. She bought a box of crafting popsicle sticks and had her mom assemble the little boats. The sail is a triangle cut out on the Cricut with red glitter glue in the form of the Heart of Tefiti.


The Cocamora boxes were a task. My sister-in-law bought the pattern for the boxes on Etsy, and you were supposed to print them on paper, cut them out, and then fold them up. My amazing husband was able to create an image in order to cut them out on the Cricut. We had to estimate the lines in order to fold them up, but it ended up working out. He was then able to create the images in order to cut out each part of their faces in order to put them together. Quite the genius, that husband of mine. And I know he's going to be super helpful when it's time to do this for our kids (which is hopefully soon!).


The cutouts for each of the characters were simple and complicated all at the same time. We ended up having to use several different features of the Cricut in order to make these possible. It's fantastic that you are able to draw, cut, weld, attach, and view the layers separately and together all on the same screen. Hei Hei was extremely intricate and we ended up using the writing feature to display the finer details. Tamatoa was just a lot of layers that all needed to be cut out separately. The gold glitter paper was several layers that I welded together in order to cut it out as larger pieces to make them easier to glue together at the end. Pua was extremely simple and made with larger pieces that were easy to put in the right spot.


The Heart of Tefiti and Shiny Cupcake signs were made using stock images and fonts from the Cricut Design Studio that I just made the right size. The cupcakes were made from box cake mix in chocolate and vanilla, cream cheese frosting from a can, and gold shiny sprinkles. We cut out Maui's fish hook at about 2 inches to glue them to toothpicks for the fish hook that is supposed to be on Tamatoa's back. The Heart of Tefiti cookies are made from sugar cookie dough that was dyed two different shades of green. We flattened the dough and rolled the two different ones together. I then used thread to cut the cookies without having to slice through it with a knife and ruining the round shape. I'm glad I retained that one trick from cooking class in high school! We then rolled the edges in green glitter, and they came out awesome.


For the palm trees that we put together in the basement, I found a vector image of several different palm leaves, and picked one that would be easy and quick to cut out. We had about 16 leaves which were used for 5 palm trees. The trunks of the trees were made from brown streamers that were hung to go all the way to the floor. We used three to give it some thickness. The coconuts are made from brown balloons. They were blown up a little too largely for the task at hand, but it ended up working out. Then we used the leaves to make the palms of the palm tree. Turned out super cute!

http://www.momsandmunchkins.ca/2017/04/25/kakamora-party-cups/The last thing we did on Friday night before the party was make these Cocamora Coconut cups. They were purchased on Amazon and we had a dozen of them. We painted the round part of the face on first in a tan color. There were several different designs in the Pinterest post.

The image that we started with is below. Some of the designs are easier than others when you're using various paint brushes, and I wish I had a picture of our whole group of them because they were so cute. The kids loved them and got to take them home!

I can't say whether or not I will put all of this effort into my kids birthday parties. I guess it depends on the time of year when they take place. I want them to have adorable birthday parties, but I don't know if it's worth taxing myself beyond belief because this kid isn't even mine, and I feel like I am just as exhausted as his parents when the party is over. I guess what helps me is that my Cricut will be at my house already and I will probably know my plan well before two weeks before the party.

Planning and doing things like this make me extremely excited for when it is my kids and I can make their day as special as they are.

Until next time...


Wednesday, June 14, 2017

Renovations and Transformations Volume 3: The Deck


So when I dreamed of owning a home, I never thought it would be a fixer-upper. As you grow up, you see a lot of different homes between family members and friends, but you don't ever see the work that goes into making that home. Then I started watching shows like Property Brothers and Flip or Flop and realized that if I wanted my dream home, I was going to have to make it that way. There was no way we were going to afford a house that was already done, so we were going to have to work and earn the house that we wanted it to be. This was the back of our house when we first bought it. There was a covered, screened in porch on the back. The furniture in the next picture was not included when we bought the house. And there was a sliding glass door entering into the porch area, and a screen door leading out into the back yard.

 It was a disaster. The screened in porch was causing issues with the gutters, so we had to tear it off. That was stressful. As we started to dismantle the different parts, the wood that was used to hold it up was rotting away. It could have fallen on us at any time. This was our second experience with a dumpster at our house. In my opinion, two dumpsters too many! We got rid of the screened in porch, and we were left with a cement patio that had cracks and holes in it. After we tore that off, my husband's brilliant idea was that we add a deck that met both levels of our house: one level would meet the sliding glass door so we could walk right out onto to the deck with no step, and the second would meet the level of the door leading out of the back of the garage. Now, it was just down to making that dream a reality.

But before we could add a deck, we came across another issue. Our sliding glass door was leaking. After we tore off the porch, and got the back of the house fixed from it's removal, the first heavy rain revealed that the door was not sealed correctly. We did some research and price checking at the various home improvement stores, and decided on a modified French door from Lowe's. The cost of the door was $418 and the install cost was around $800 due to the issues from the old door. It was a small price to pay to preserve our beautiful new kitchen and keep the water from causing any other issues.


My husband works for a printing company that specializes in sporting goods, and one of the guys he works with used to work for a contractor that built decks. This person offered to complete our deck on his own while only charging us $18 per hour for his services. Now, if you've ever had a contractor work on your house, you know that labor is the most expensive part, and often it is more than the amount that he was charging. He came to our house, measured, helped us order all of the lumber, concrete, screws, and anything else that we needed, and as soon as it all showed up at our house, he was there to work. He spent a total of 5 days and about 45 hours working. My husband helped dig 5 of the post holes, but other than that, his friend was on it. He was precise, worked hard and quickly, and the deck came out beautiful. Below is a timeline of how it was developed.

The first thing he came and did was framed in the upper portion of the deck.He had to install six posts by breaking pieces of the concrete patio off and digging holes. I can't even imagine what it was like smashing a sledge hammer against concrete until it broke, but he got it done. Once he had the upper part all framed in, he started cutting and screwing down the deck boards to complete the upper portion of the deck. This was a good thing because we have a little pup and she did not like trying to go outside when there were joists in her way.

Once he'd finished laying all the deck boards on the upper portion, he began framing up and putting the joists int he lower portion. Slightly easier this time because there was not as much concrete to bust through. 


 Once the lower portion of the deck was finished, he began installing a three foot stair around the corner of the deck that leads into the back yard. This idea was with Callie (our pup) and someday our future children in mind. We can't just have them falling off a 16 inch drop into the backyard. He assembled the framing with the remaining wood from the joists and then used deck boards, which he took the time to cut at 45 degrees, to create the top of the step.


Here is a photo of just the step all done. It looks incredible.


Don't mind the mess, but this is a photo of my husband installing the motion sensor back porch light that we got at Lowe's so that our dog would have some light in the back yard. This is also a photo of our completed deck minus the railing. We plan on adding a railing as we can afford the pieces. Building a deck is no easy task and it's definitely not a cheap one.

Lastly, here are some photos of the porch light installed as well as the deck lights that my husband put in for the step down onto the lower deck.

 This is a project that I was extremely wary of at the start. We were asking a friend to complete a large task, and while we were paying him, it is always hard to ask that of someone. I was also stressed out about the cost. Every time it feels like we're getting somewhere with this house, we end up spending more money than we thought we were going to, and I am the budgeter in the house, so it stresses me out. But, at the end of the day, I am happy that we decided to go for it. Not only does it add value to our home, but now I can spend some long summer days sitting on the deck while my puppy plays in the yard. I can only imagine what it will feel like when we have a couple little ones back there.

Until next time...


Wednesday, May 17, 2017

Homemaking

If you haven't figured it out yet, I draw most of my inspiration from Pinterest. I am not super creative on my own, but put an idea in my head, and I will run away with it in many different directions. Many of the projects that I save on Pinterest, and plan on completing, are not usually done exactly how the tutorial says or how the image looks. With that in mind, here we go...

Sewing is something that has always intimidated me. My dad could do enough to fix holes in my shirts or put buttons back on. I didn't think it would ever be something that I would be interested in doing. Then I got married and started thinking about the possibility of a family. The first real Christmas I spent with my husband and his family, my nephew was 6 months old and it was his first Christmas. My sister-in-law pulled out her sewing machine to make him his own stocking as a member of their little family. I saw those three stockings hanging together on Christmas Eve, and the only thought I had was that I had to do that for my family. So for Christmas last year, which will have its own dedicated post (I went a little crazy!), I made stockings. I made them. With a sewing machine. Something I never thought would happen. From there, it started a sort of addiction. I started looking at all of the different things that I could make with a sewing machine: curtains, baby blankets, bibs, burp cloths, etc. It had so many practical and decorative uses. I asked a friend if I could have her old one because she got a new one. Turns out, I didn't even have to do that. My mother-in-law was paying attention to my new obsession, and bought me one for Christmas. She got me a Singer sewing machine and many of the accessories that went with it like bobbins, thread, scissors, a piece of fabric to practice among other things that go with someone getting their first sewing machine.

At this point, the project ideas seemed endless, but I kept coming back to one: curtains. After seeing my sister-in-law's curtains at their old house, and knowing that it wasn't too difficult to do, I wanted to make my own. It just seemed like a personal touch that makes your house that much more a home. First, I had to pick out fabric. That was an adventure. But after several trips to Joann Fabrics, Field's Fabrics, and Hobby Lobby, I finally picked one.

This is a home decor fabric, and I ended up buying the last 6 yards that they had. The fabric was originally $9.99 per yard, but was on sale for $6.99 per yard, and I also had a 20% your entire regular price and sale price purchase, so the total for the fabric was $36 which is not too shabby considering all I have to make.


First on the agenda was the window above our sink. Something about it looked unfinished, and I thought that curtains would be the perfect touch. I browsed on Pinterest, and found this image. I think it was originally more about the wreath than the curtains, but I liked the design of the curtains, and my husband loved the checkered pattern for the kitchen. Obviously, I convinced him otherwise! We decided to do a simple tension rod in the window frame which worked out perfectly size-wise. Our window measured 36 inches wide and 36 long from the top of the window to the windowsill. The fabric that I purchased was 45 inches wide and I cut a little more than 1 yard of fabric off of my 6 yards for the sake of hemming and creating the loop at the top for the curtain rod.


I kept the entire 45 inch width to start and cut the fabric into two equal pieces at 22.5 inches. I wanted the design to be vertical which will eventually match the French door curtains that I am going to make. Even with the total width of the window being 36 inches, I kept as much width as I could for the gathers at the top. Laying the curtain panels long-ways, I hemmed both the left and the right side 1 inch leaving me with a 20.5 inch wide panel. I pinned and sewed the hem on each side in white thread. Then I had to consider the top and the bottom. The bottom I hemmed 0.5 inch for a nice clean look. For the top, I folded the fabric over 1.5 inches. This was the hem and the loop for the curtain rod all in one. I did not hem and then fold again for the loop. This still gave me a total hem of 2 inches. The curtain rod slipped right through, and I now have curtains above my sink as shown in the picture, excuse the dishes!

I went from being completely intimidated by sewing and using a sewing machine to wanting to do everything I could to use it and make different things for around the house.

 With my remaining yards of fabric, I've got 5 left, I plan to make these. We just got brand new French doors installed in our kitchen that lead out to our deck. Traditional curtains are hard for French doors because of the way they open, so my husband and I started browsing curtain ideas on Pinterest and found these. We plan on finding magnetic curtain rods, Bed Bath and Beyond has them, and then I will be using my trusty sewing machine to make the curtains. Post on that coming as soon as it happens! This probably will not occur until sometime after school gets out, or unless I feel extra motivated during the week when I get home from work. Measuring and putting all of those pins in gets to be a pain in the back after a while!

Until next time...

Wednesday, May 10, 2017

Renovations and Transformations Volume 2: The Family Room


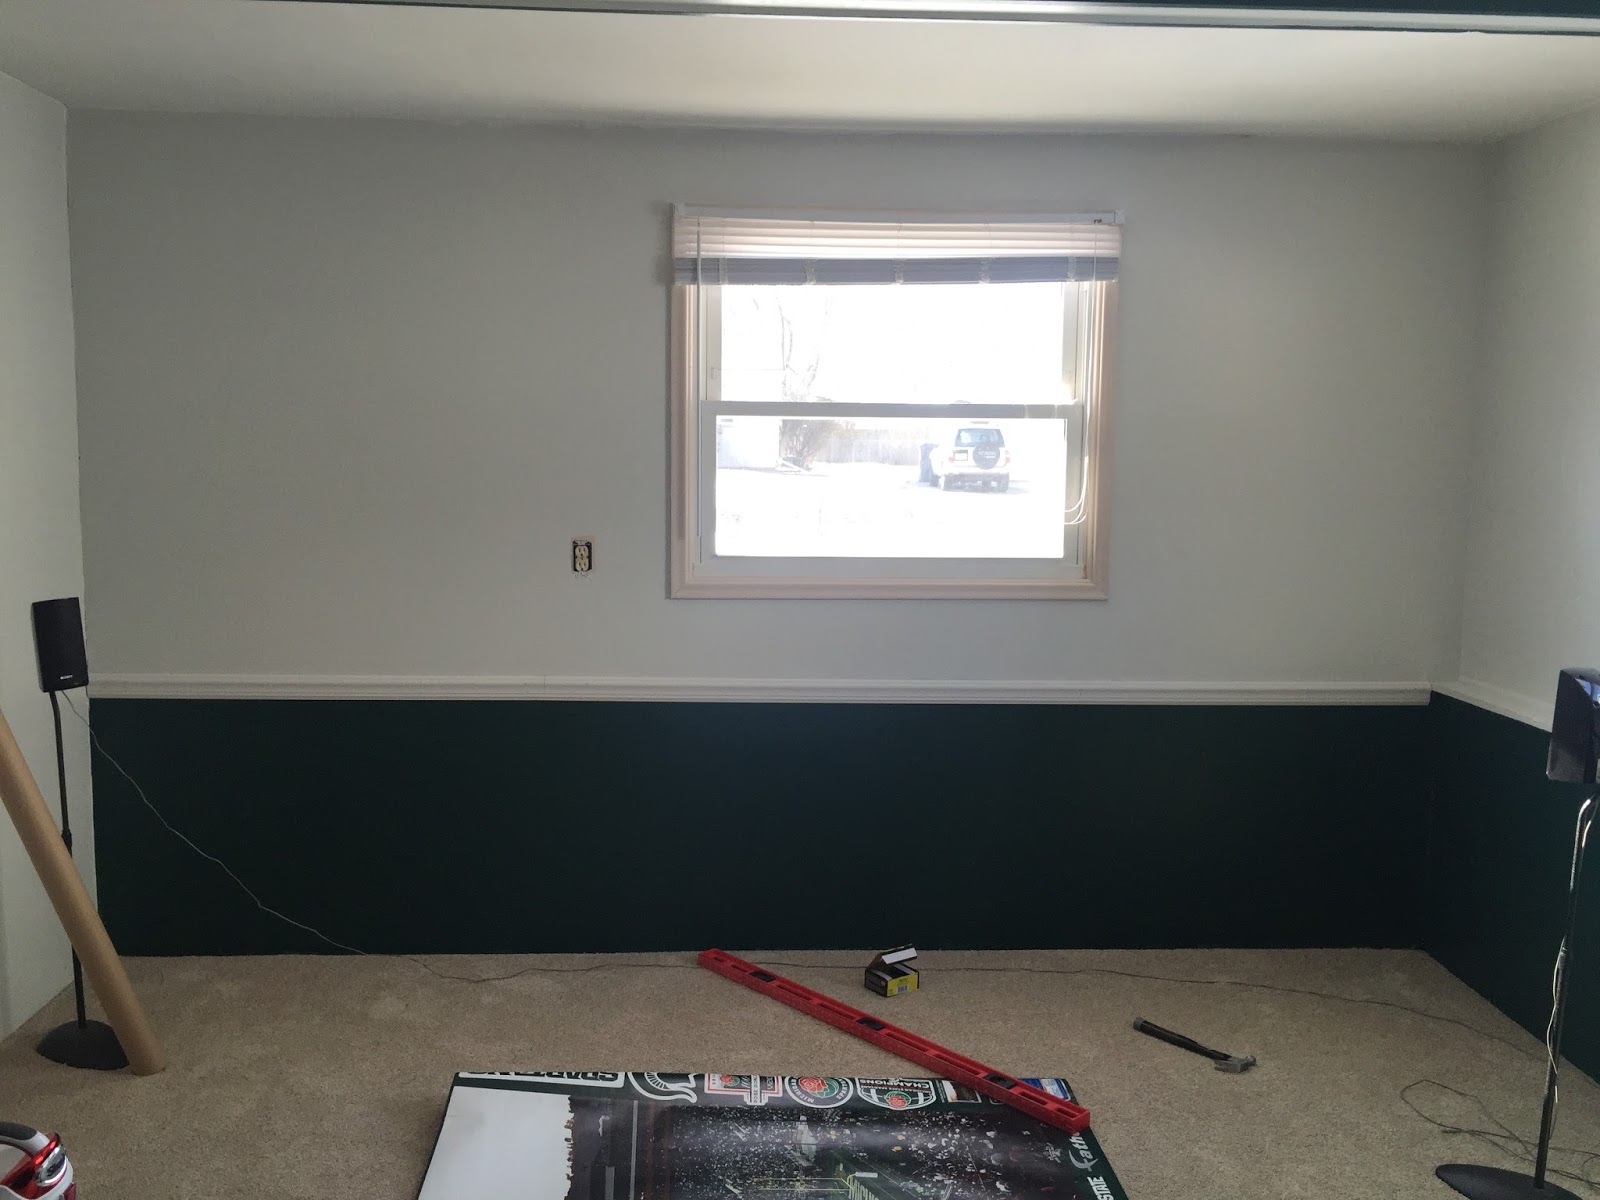
When we first moved into our house, everything was drab and dated. Every room needed something, and we have made it our goal to transform this house into our home. The first room that we tackled was the kitchen, and I will get to that story. Believe me, it's a good one. This is the downstairs living space, and what we have transformed into my husband's Spartan Room, and what I hope will one day be our family room. When we started, the room had dark blue carpet, the hallway had laminate tile, the stairs going upstairs were the wonderful tri-colored carpet from the living room. There was paneling below a chair rail, one wall was covered entirely in several layers of wallpaper, another wall was covered entirely in paneling, the light fixture looked like it was meant to be outside, and the beautiful wooden beams in the ceiling were painted to match the walls. It was hard to know where to start. Pulling up the carpet in all of the other rooms in the house gave us a place to go. When we re-carpeted the master bedroom (another story for another day), we also did the downstairs family room. Before carpeting, we wanted to get rid of the wallpaper and the paneling, and get paint up on the walls to save us the trouble of protecting the carpet later. This is the one room in the house where my husband got to pick the paint color because I promised that he could have his Spartan Room just like his dad's. We painted one whole wall white, the area below the chair rail a dark green and above white, and then the wall of paneling was painted dark green as well. We chose a tan carpet with some variation in it for the general wear and tear.

 We also decided, with his mom's help, to paint the beams on the ceiling dark green and keep the stripe down the middle white. They were painted already, so we figured, why not just paint over that.

The first picture shows just after the carpet guys finished installing, and we had already done the painting. The line looks a little uneven because in the next photo we added the chair rail to make the straight line.

The only thing that has not been changed out in the entire room so far is the window trim. We have not yet figured out how to cut the quarter round so that it sits the right way in the sill to seal it up.

The TV went up in the corner on the green wall, and now above the TV is four posters from when the Michigan State football team went to the Rose Bowl in 2014. Of course my husband has LED lights hooked up to the back of the TV that glow different colors and whenever the Spartans play, they glow green.


The DVD cases have since moved to be up against a flat wall because we want children and didn't want them to be able to pull them over onto themselves. Those are black/brown Billy DVD cases from Ikea. The TV stand is a Hemnes TV Stand from Ikea and has the extension on one side to have two glass doors and a drawer in the middle.


 We had to take the original railings down to paint and redo them, and my husband thought they weren't fancy enough for our house, so we found ourselves back at the hardware store looking at stair railings. Of course, I picked out the super fancy one that has a delicate design on it. My husband did all the cutting of the railings himself, and even figured out a way to make cuts so it would turn into the wall, and have that awesome finished look.


 For a while, when we first bought our house, we didn't have a whole lot of furniture, and our family room downstairs had a TV stand, two DVD cases, and bag chairs for us to sit in and watch TV. I will always remember our first Super Bowl in our house sitting in a bag chair next to my husband. I won money on that game, too! Last summer, we came across one of the greatest finds for our house: a 4 piece, La-Z-Boy Sectional sofa. We were at a clearance sale at a furniture store, and my husband happened to walk by this sofa, and it had a $500 price card sitting on one of the arms. It seemed too good to be true, but it wasn't. We had it delivered a week later, and our family room looked just a little bit more finished. And let me tell you how much this couch is my dream sofa. I have always wanted a sectional with a chaise lounge on one end and a recliner on the other, and that's exactly what I got. It was unbelievable! The pillows are decorative pieces that I added for my husband as part of his Christmas present. I found the pillow cases online through an ad I saw on Facebook, and the pillows themselves are forms purchased from Joann Fabrics. I always use coupons at Joann so I didn't pay full price.


The next thing my husband wanted was curtains for his Spartan Room that were Spartan related. My sister-in-law made Roman shades for the bathroom at their house, and it seemed pretty simple. The tutorial that I followed from Pinterest is linked here! My husband chose Spartan heads with football helmets backed with opaque black fabric to make them more light tight. I sewed the two fabrics together similar to a pillowcase, and then followed the directions for the Roman shades.

Then it was time to add the rest of the decor. Being a Spartan fan for life like my husband means that you have lots of stuff. I have only recently begun adding to his collection of things. The large mural is a fathead of the 2014 Rose Bowl game which my husband took his dad to, so he was there. We added the small panorama of Spartan Stadium when we lived in our apartment, and I got him the two other signs. One is family rules that includes being a Spartan fan and the other came from Campus Den, a store filled with college items that says Love You to East Lansing and Back because that may as well be his moon!


We have since added a new coffee table and end table. I bought the end table for my husband as a Christmas gift, and his parents got him the matching coffee table. They really add a touch to the room that the old coffee table was unable to do. They match the rest of the black furniture, and they have Spartan heads on them.

 This renovation was a little bit cosmetic and mostly decorative, but my husband is happy and that's what matters.

Until next time...


Sunday, May 7, 2017

Renovations and Transformations Volume 1: The Living Room

Since I was little, I had dreams of owning my own home. It seemed like such a far off thing. So abstract at the time. I couldn't wait to organize it the way that I wanted and have my friends over for dinner parties. Now, at the ripe age of 27, I am a homeowner and learning exactly what that means. There are so many little things, and bigger things, that go into owning a maintaining a home than I ever realized.

A good chunk of the posts on this blog will probably end up being about my personal adventures in owning a home and all that it has entailed so far. We have only owned our home for about a year and a half, and the word transformation does not even begin to describe what has occurred in this house. We'll be taking it room by room, beginning with the purchase of our fixer upper and the living room, and all of the little things, and the big things, that have gone into making this house our home.

From the beginning, we knew that we were going to purchase a fixer upper. We just didn't know that the one we bought would need quite so much fixing. When we finally settled on our home, we had already decided that it need a brand new kitchen (that will be a lengthy post), and improvements everywhere else. On October 29, 2015, just 3 short months after we got married, we bought our first home, and the renovations began.

Our home is just under 1800 square feet with 4 bedrooms, but we're converting one into an office, 2 full bathrooms, a living room, kitchen/dining room, family room, and laundry room. It might sound small at 1800 square feet, but when it's just the two of you and your dog, it's a mansion, and I wanted every part of it to be perfectly done and decorated before we bought it. That's not the case with your first home unless you can afford it, or want to settle for something else.

We decided to take the leap, and dive head first into a renovation that is still currently ongoing. There were definitely times where it seemed like we bit off more than we could chew, but we learned about ourselves and each other, and definitely learned the value of teamwork. Working on this house together and making it into our home has definitely strengthened our marriage, and I am finally seeing that dream I had as a little girl turning into a reality.

The living room was not our first project, but it is one that I really enjoyed doing. When we first moved into this house, there was a pass through to the kitchen on one wall, tri-colored carpet on the floor, a 1960s railing by the front door, and the walls were painted a dreary brown color. I wanted to change everything and I wanted it done instantly. Well, instant is not a word that you can use when it comes to renovating a house. These things take time, and often money.

 The weekend that we moved in, we noticed a weird smell throughout the house that we hadn't noticed before. We found out later that the previous owner may have had an animal that did some work on those carpets that were all over the house. Our mission became: remove the carpet as quickly as possible. So we did, and underneath all that carpet, we found all of the original hardwood. We were so unbelievably excited about hardwood floors until we found a bunch of stains from said animals. That wasn't going to slow us down though. Next, through our work in the kitchen, we covered the pass through with dry wall to separate the kitchen from the living room and give us a solid wall on both sides.
 Then we started talking about what to do with that railing that was right next to the entrance area. At first we thought it was structural, so we were going to cover it with a half-wall and post to the ceiling. Then as we began looking at the area and attempting to prep it for framing and dry wall, we realized it wasn't structural, we yanked it right out. I was so excited that we didn't have to have a weird half wall or that ugly railing!
After removing the carpet, covering up the pass through, and removing the railing, we had the wood floors refinished. We had the living room, stairs, hallway, and the spare bedroom upstairs done. It cost a pretty penny, but it was totally worth it. Then we painted the walls, a Valspar Signature paint named Flax Seed. We used that color for the living room, kitchen, and hallway through the upstairs for continuity. The last part of the refinishing process was the baseboards and trim. We used pine woodwork purchased from Menard's and my husband was a rock star and stained and cut each of the pieces himself. We currently have all the baseboards in the living room done, the door trim, and the window trim around the big picture window. 

After all of that work, it was time for me to actually go to work and add the finishing touches. We still had the couch from my first apartment. A maroon/purple sofa that fed off the warm tones in the paint color. We added an area rug from a clearance sale. Let me be the first to tell you that I never thought I would own an area rug. We currently have the coffee table and end table from his Grandma's old house. They fit in with a dark wood theme for the furniture. The most recent add in the furniture department was a black/brown sofa table from Ikea.  
Of course, once all of the furnishings are in place, it's time to add the decorative touches which is my favorite part. On the end table, I added some touches from our wedding and honeymoon. Our unity candle makes a lovely decoration along with a photo from Disneyland in California. The Home sign leaning up against the wall is a piece made by a friend of mine for my birthday. We plan on adding that to the blank wall and then creating a gallery wall of pictures of our family. The wedding photo is a 24 x 36 canvas ordered from pictureitoncanvas.com. They always have phenomenal sales!

The bottles on the coffee table are a craft of mine. I bought a six pack of Angry Orchard because it's one of the few beers that I can stand, thin twine, and some fake flowers. I change the flowers for the season. I originally intended them to be fall decorations, but realized I could just change the flowers to make them year round decorations. I used hot glue to hold the twine to the beer bottles. Obviously, I had to drink the beer first!

Now before I continue, I should admit that I am a shameless Pinterest addict. I use the app at least once a day, if not more, and I am constantly pinning new things that I want to try or use in my own home. The entranceway to my home is completely Pinterest inspired. I saw this picture of a sign with the verse "As for me and my house, we will serve the Lord," and I knew that I wanted to include that in my home. We are a Christian family and hold to Christian values and it is the perfect sign to enter my home to. I found the perfect one at a craft show for $20 already carved and painted. It was the perfect color as well. The hooks below my sign are from Target, and I believe they were also around $20. Such an easy an inexpensive idea. I thought about making the hook rack myself, but it was already done for me.

The three canvases were purchased from Canvas On Demand as part of a deal. The first two were a 2 for $50 deal, and the third was part of a 3 for $80 deal that we split with my husband's parents. We chose to do one picture from when we were dating, then engaged, and the third was after we were married. The glass frame above the center picture was a gift from my best friend the Christmas before I got married.

The sofa table has become my Pinterest inspired decoration table, and changes with the season. For the spring and summer it is adorned with these wine bottles. I chose to use green yarn to accent the color in the throw pillows on the couch, and then I used a thicker twine to match the thickness of the yarn. They were inspired by the bottles below mine. I chose to add a matching photo frame with a picture of my family to symbolize what home is to me. Right now, home is my husband and my puppy Calhoun.


 The final touch that we put on our living room were the curtains and photos from our wedding around the picture window. I found the perfect green curtains that match all of the other accents that I chose to use in green from kohls.com , and they were buy one get on half off! The sheers are from Sears, they were on clearance for $8! The curtain rods are a brushed nickel finish that we also got from Kohls. They were on sale as well. I hope you're sensing a pattern here :). The photo frame decor around the window was a wedding gift from Bed, Bath, and Beyond that was on our registry.

It wasn't an easy process or a quick one, but it was definitely worth all of the time and effort that I put in to creating this space. When the time comes to change the decorations for fall and Christmas, I can post on each of those. Many of those are Pinterest inspired crafts and ideas as well. Next up...The Spartan Room

Until next time...